To visualize fabric as a finished garment, you can drape it on a mannequin, sketch it, drop it into a Photoshop mockup, simulate it in 3D software, or generate a photoreal preview with AI from a single fabric photo. AI is the fastest for most people. Draping and 3D are better when you need to judge fit and fall.
Most unstitched fabric is sold flat, on a roll or folded in a bag. The buyer has to imagine the kurta, the frock or the abaya it will become. That gap costs sales for fabric sellers and costs time for factories and brands, who often stitch a sample just to answer the question "will this print work as a shirt?" This guide compares every practical way to close that gap, so you can pick the one that fits your work.
What are the ways to see fabric as a garment?
Draping on a mannequin. Pin the uncut fabric onto a dress form or a person and look. It is free if you own a form, and it is the only method that shows the true weight, sheen and fall of the actual cloth. But it shows a rough silhouette, not a cut garment: no collar, no sleeves, no hem.
Sketching. A designer draws the garment and fills it with the print, by hand or in Illustrator or Procreate. Sketches are good for agreeing a style. They are poor at showing how a specific print will read at real scale, and they need someone who can draw.
Mockup templates in Photoshop. You buy or make a template of a photographed garment and place the fabric image into it as a smart object. Results can look clean, but the template fixes the style. One template is one silhouette, so a new neckline or length needs a new template, and getting the print to follow folds convincingly takes skill.
3D garment software. Tools such as CLO 3D and Browzwear simulate a garment from real digital patterns and fabric physics. They are the standard for technical virtual sampling in large brands because they can show fit, tension and drape on an avatar. The cost is in setup: you need patterns, measured fabric properties, licences and trained staff.
AI image generation. You upload a photo of the fabric, describe or choose the garment, and an image model renders a photoreal garment made from that cloth. No patterns, no templates, no drawing. It is the fastest way to see many styles from one fabric, but it is a visualization: the model interprets the print and drape rather than simulating them from measurements.
Pros and cons of each method
| Method | Speed per look | Skill needed | Shows real drape? | Best for |
|---|---|---|---|---|
| Draping on a mannequin | Minutes, if the fabric is in hand | Low | Yes, the real cloth | Judging weight and fall in a shop or studio |
| Sketching | Hours | High (drawing) | No | Agreeing a style direction |
| Photoshop mockup | Minutes once a template exists | Medium to high | Approximate, fixed by the template | Catalogue images in one repeated style |
| 3D software (CLO 3D, Browzwear) | Hours per new style; faster for colourways | High (patterns and software) | Simulated from fabric properties | Fit and technical development in brands and factories |
| AI image generation | Usually under a minute | Low (a photo and a description) | Interpreted, not measured | Seeing many styles fast, buyer decks, listings |
Speed and skill are typical for each method; they vary with the person and the garment.
How does an AI fabric-to-garment preview work?
An AI garment preview starts from one or more photos of flat fabric. The image model reads the colour, print, scale and texture from that photo, then renders a garment that looks as if it had been cut and stitched from the same cloth, worn or displayed in a realistic setting.
The garment itself comes from your instructions. In Preloom, you pick a garment type (a men's kurta, a shalwar kameez, a saree, a lehenga choli, a girls' frock and many more) and either a ready style template or a plain-English description of the cut, neckline, collar, sleeves, length and occasion. You can also add a reference photo of a garment to guide the silhouette and drape.
Because there is nothing to set up, you can try a fabric as a kurta, then as a frock, then as a waistcoat, in the time it takes to stitch one hem. That is the real advantage: not perfect accuracy, but the number of ideas you can test before anyone cuts the cloth.
How to preview fabric as a garment with AI
- 1
Photograph the fabric flat
Lay the fabric pressed and flat, shoot from directly above in indirect daylight, and include at least one full repeat of the print. The fabric photo guide covers this in detail. The photo decides the colour of the preview, so take care here.
- 2
Upload it, or pick it from your library
Add one photo for a single fabric, or several for a garment that combines a body fabric, a border and a dupatta. Swatches you save to the fabric library can be reused in later designs at no cost.
- 3
Choose the garment and the style
Pick the garment type, then a style template or a written description such as "straight-cut men's kurta, band collar, full sleeves, knee length, for Eid". The style description guide shows which words matter.
- 4
Set the model tier, quality and size
Use low quality for quick drafts while you explore, then medium or high for the version you will show a buyer. Portrait (1024×1536) suits full-length garments; square suits social posts.
- 5
Generate, then tweak
Review the preview and refine it with a plain instruction such as "make the collar mandarin, sleeves 3/4". Each version is kept, so you can go back to an earlier one.
From flat fabric to a stitched sherwani
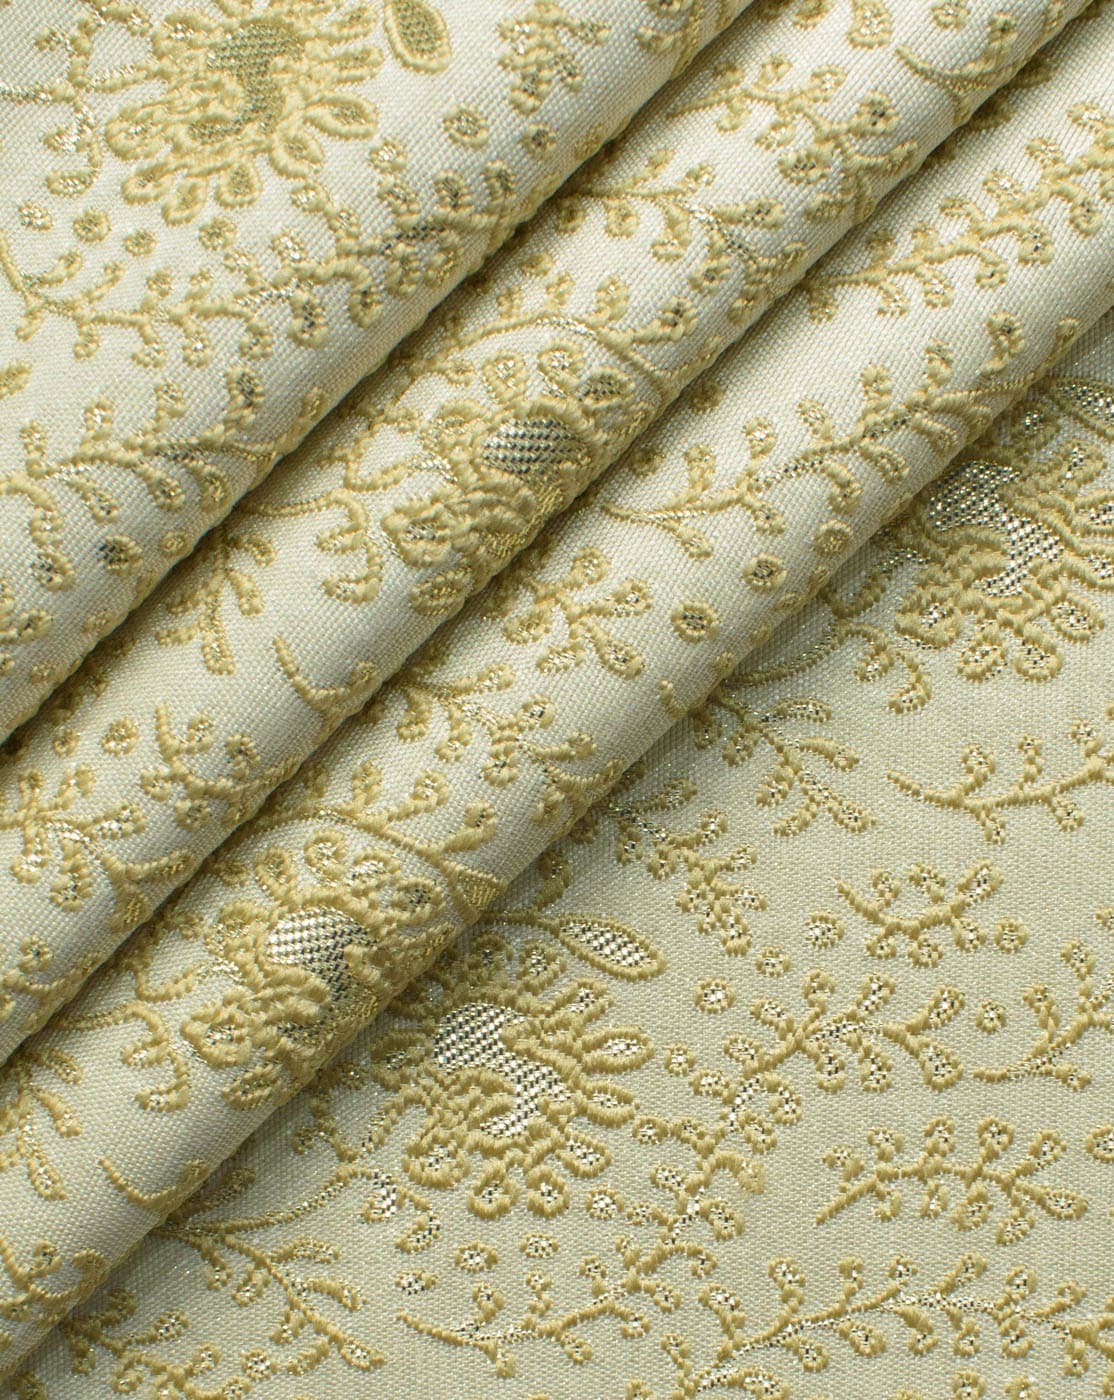 Fabric
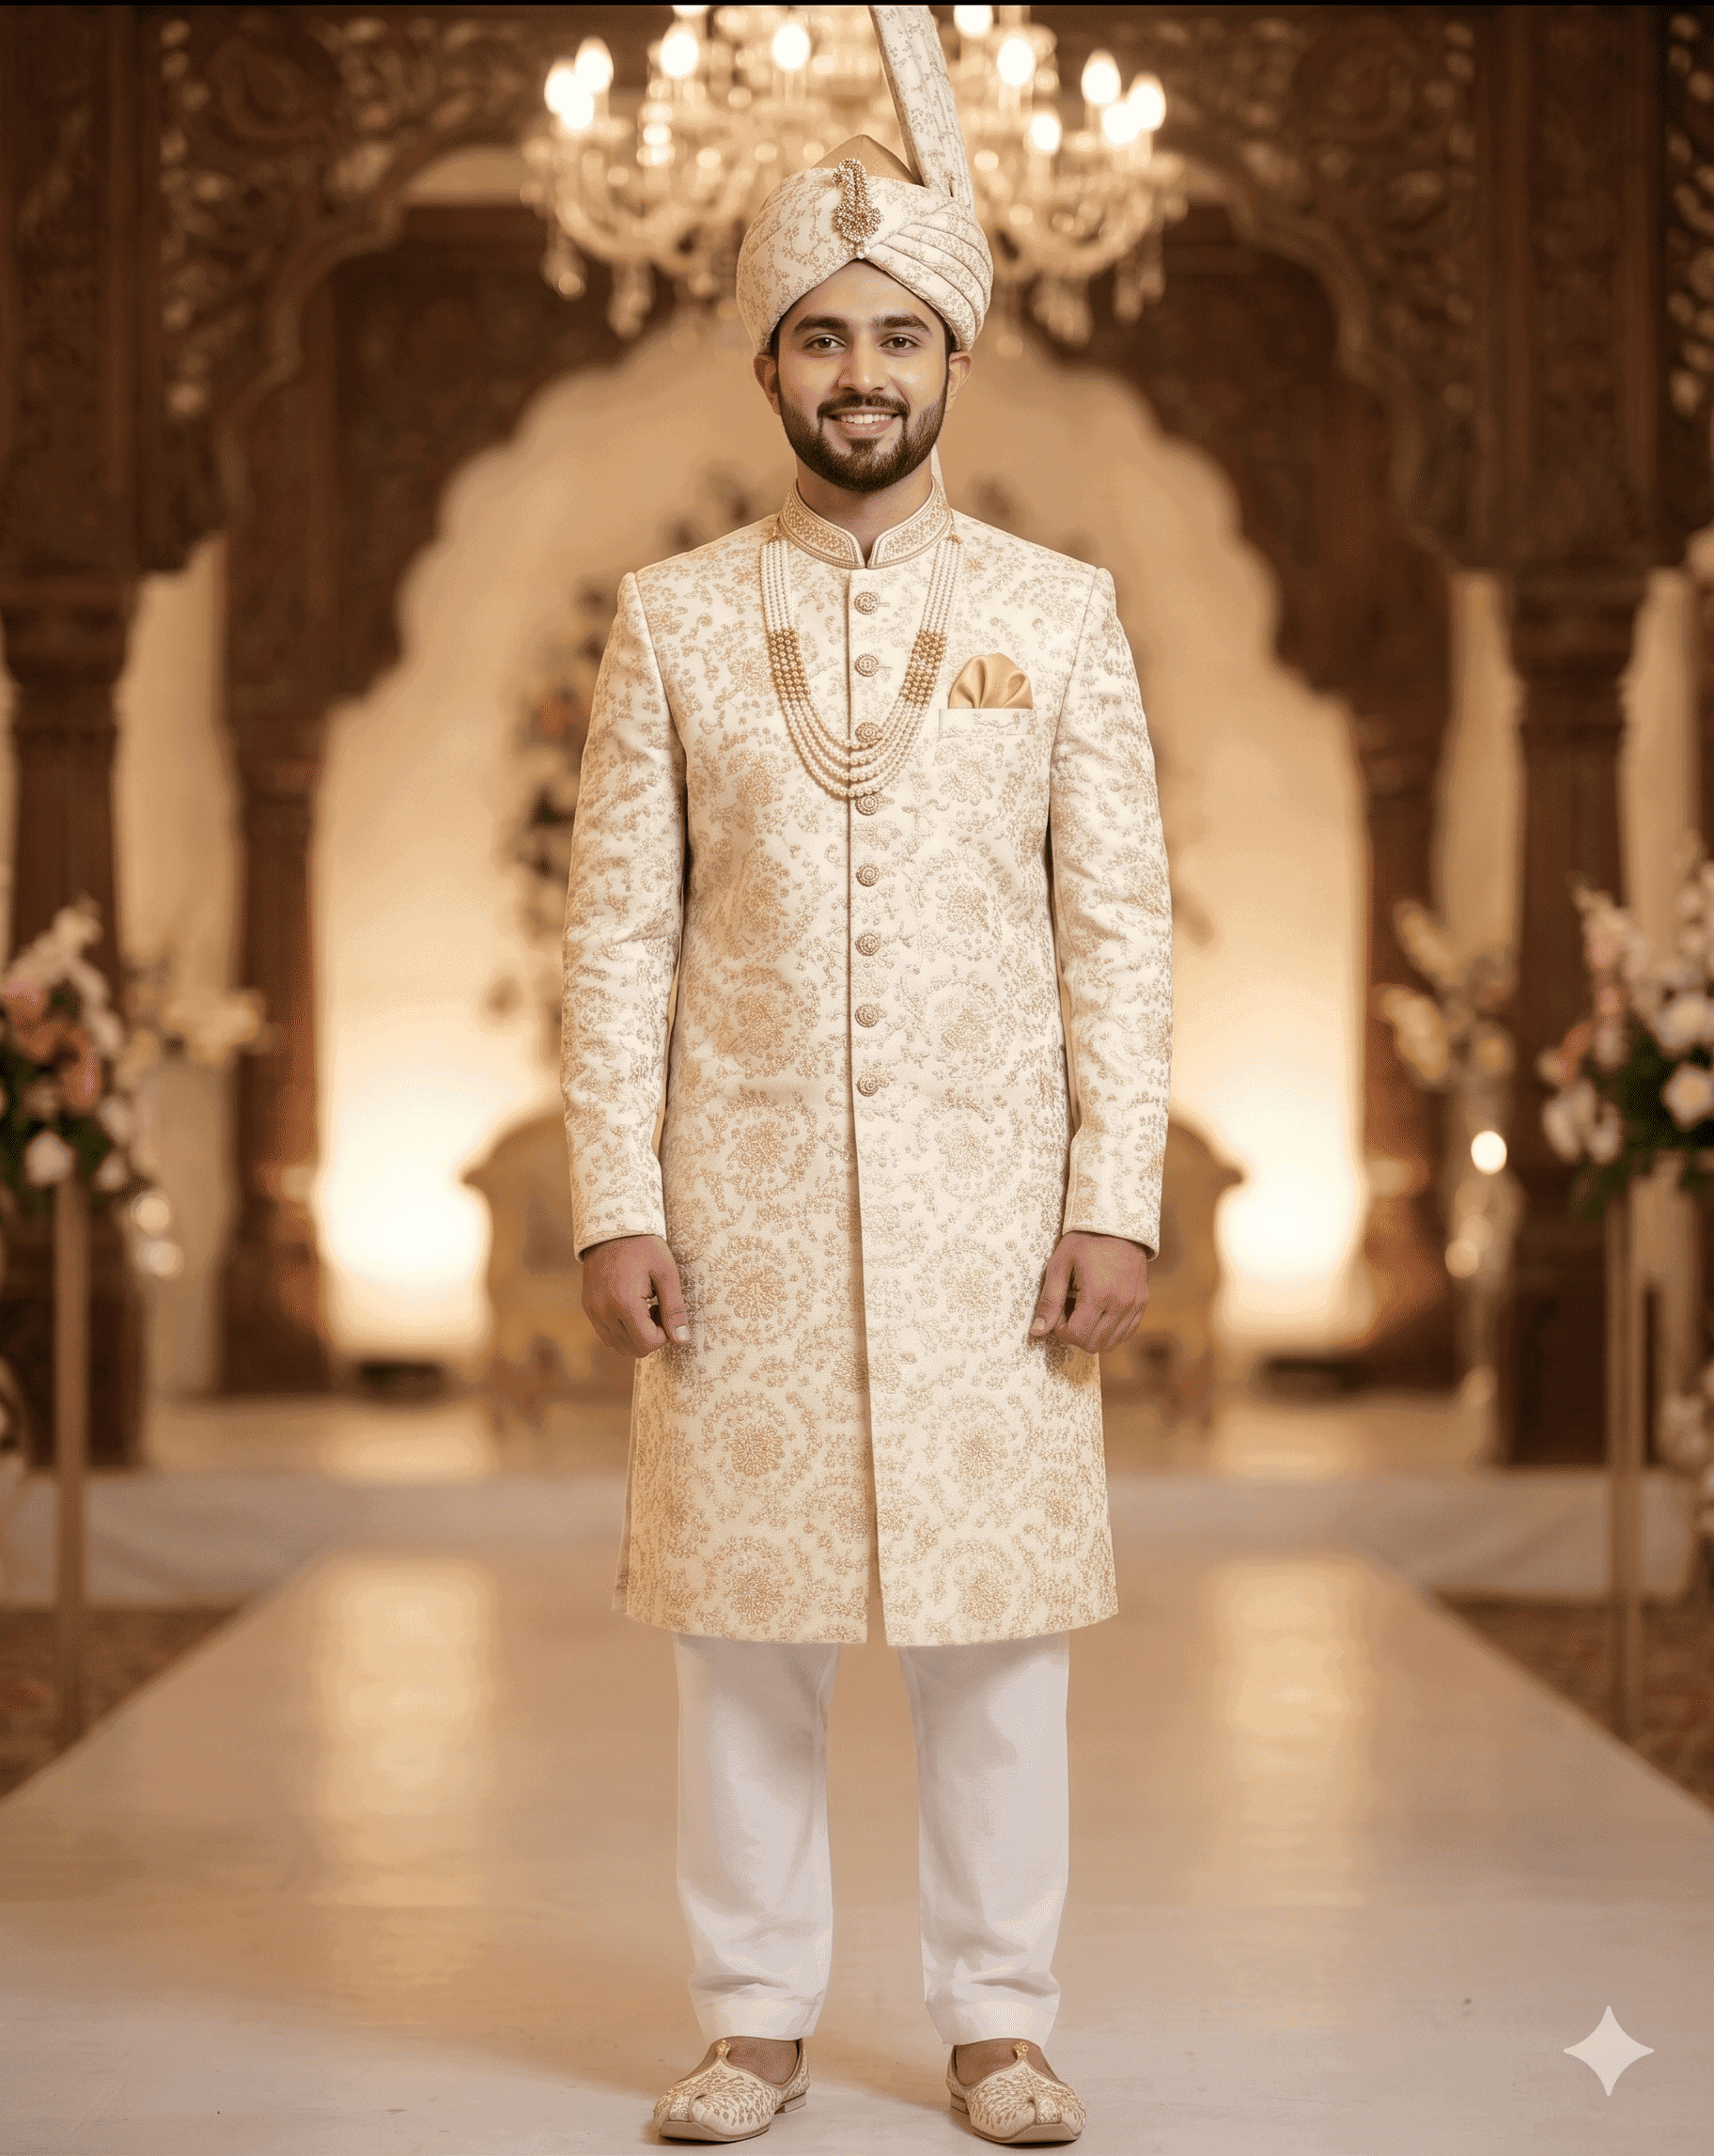 Preloom output
Which method should you use?
If you sell unstitched fabric, AI previews are usually the right fit. Your customer wants to see the suit, not the bolt, and you may have hundreds of designs to show. See selling unstitched fabric online for how sellers use previews in listings.
If you are a factory or brand developing a range, use AI previews early to choose which fabrics and styles deserve a sample, and 3D software or physical samples for fit. The virtual sampling guide explains which sampling stages each method can and cannot replace.
If you are a tailor or a home customer with one fabric and one garment in mind, draping it over a mannequin or yourself in front of a mirror is free and honest. An AI preview helps when you are choosing between styles, or between two fabrics before you buy.
Getting the most accurate result
- Start with a flat, evenly lit fabric photo; most colour problems begin there.
- Upload borders, pallu and embroidery as separate close-up photos.
- Describe the style in concrete terms: cut, neckline, sleeve length, garment length, occasion.
- Generate drafts at low quality, then a final at high quality.
- Compare the print scale in the preview with the real fabric before you show it to a buyer.